3 Easy Boho Prom Hairstyles
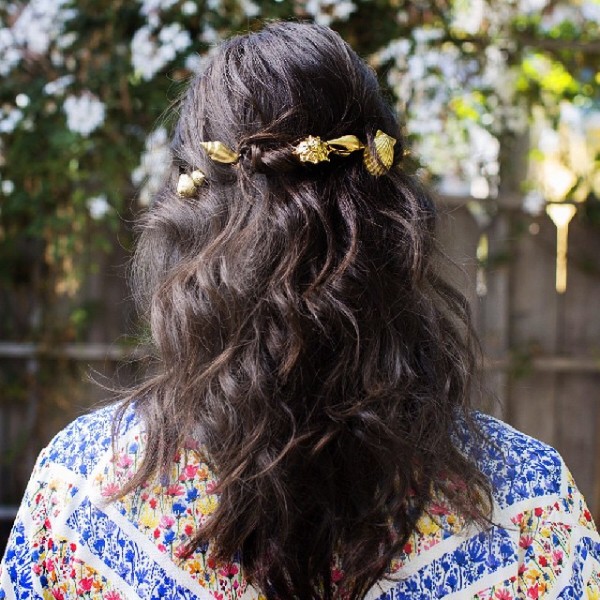
In this article I have came up with 3 easy Boho prom hairstyles that you can create by yourself. Here are the description on how to create those 3 Boho prom hairstyles.
Boho Prom Hairstyle#1: Braided Half Up
The first one I pulled is called the braided half up, and this one’s simple. It’s just taking two braids and crossing them over, laying them nice and flat and pancaking them a little bit. So this one’s very simple. You could do it on a friend, you can do it on yourself.

Things you need for this hairstyle:
- Hair curler
- Dry shampoo
- Comb
- Bobby pins
- Elastic bands.
Step: 1
You need to start it up with some curls in your hair. Then you need to tease the top of your hair so that you get a lot of fullness in here. And you can also add a little bit of volume to your hair with the help of dry shampoo, just to give it a little more grit. So just take your teasing comb, go to the front of your hair, and you’re gonna backcomb in little sections. When you’re backcombing, just make sure you’re only going down, don’t go up and down and up and down. This will help the hair from getting too knotted and make it easier to undo later. When you’ve got the tease where you want it, you need to flip your hair back.
Step: 2
Figure out and put a little part line right where you really want that fishtail to go. Try to make sure that the line is hidden. Once you get your section squared away, make sure your hair is puffed. So you’re gonna just softly set it, and then instead of going and digging with your comb, use the flat side of your comb to just barely comb the top layer of those hairs. You just don’t wanna see the teasing underneath, but you don’t wanna pull any of the teasing out in the process.
Step: 3
Now you can decide whether you want a braid right there or a fishtail. You can braid it far enough that it crosses over the bobby pins. And then stop braiding it and then go back and pancake. Then you need to pull those outside edges and just really stretch the braid. Now you’ve got enough hair to just barely cross over those bobby pins, then you need to use an elastic and secure it.
Step: 4
You need to do the same process that you did on the 2nd and 3rd steps on the other side. Then you just need to tweak them a little bit and see which one looks better laying underneath, and which looks better laying over the top. And you are done with your first hairstyle.
Boho Prom Hairstyle#2: Boho Bubble Braids
The second one is called the Boho Bubble Braids. This one’s really easy. All it requires is a few elastics and then you just bubbling the ponytails in between. So definitely one you can accomplish on your own.

Things you need for this hairstyle:
- Curler or Curling band
- Elastic band
- Comb
- Bobby pin
- Silver metal rings or clips(If necessary)
Step: 1
What you have to do to start is curl your hair. You an also use a curling band. To start with from the top, you just gonna take your fingers and grab two little sections. And you’re gonna just make a little bubble right there using an elastic. Then you gonna tighten the elastic down.
Step: 2
Then you gonna pull the front of your hair forward. So you need to add fullness and texture to the front. Then you are just gonna mimic that on the opposite side.
Step: 3
Here comes the easy part. So you’re gonna take the ponytail and you’re gonna backcomb through it. And this is really rough. It’s just literally making what looks like a mess but it’s gonna be fine. And then you take that ponytail and just finger comb, we don’t want any little sharks. Just finger comb those pieces down. But what that did was create a bunch of texture in the hair.
Step: 4
Now, you need to go down a couple of inches from the first elastic and secure it with the second elastic. And then what you do is just pull the hair. Now you’re creating just a bubble, your fluffy bubble shape in that elastic. Do the same thing all the way down.
Step: 5
When you are done with the bubbles, you should make sure that the ponytails sit back, just against your head. Don’t let them flopping forward. So you just need to take a bobby pin and secured them into place. And then take some cute, little silver rings. You can buy them at any hair supply store. Since this hairstyle was so Boho looking, popping these little things in just turns out. I think it will just give it a little more look to your hairstyle.
Boho Prom Hairstyle#3: Disney Princess Aurora Hairstyle
This one is for, in case you wanna feel like a Disney princess on prom day, so I have pulled the Disney Princess Aurora hairstyle. So this one’s like twisted and we even put a little baby’s-breath in the hair when we do it, so that it look very natural and very, very Aurora.

Things you need for this hairstyle:
- Comb
- Elastic band
- Bobby Pins
Step: 1
For this you gonna take the front section of your hair, and section it into two from the center.
Step: 2
Then you’re gonna twists it. So you are going to separate it into two pieces and you need to go in with a diagonal look down your head and it needs to be pretty soft. So you are not gonna twist it too tight, especially right there at the front and secure them with an elastic.
Step: 3
Now you’re gonna go back and you gonna just take pieces, like loops of your twist, and go ahead and pull. Then you are gonna wrap it up and through. Then what you can do is loosen that up, so that it covers that hair tie altogether.
Step: 4
If you’re worried about that coming undone, you can always take a little bobby pin and just go ahead and stick it on the backside of where you crossed that hair, to just help hold things in place. You can choose whether or not to do this if you want.
Step: 5
In this step, you can take some little baby’s-breath, and just go ahead and randomly place little sprigs.
Here are some more Boho prom hairstyles for you:


