No Tool Nail Art: 5 Easy & Cute Designs!
In this post I will show you that how to create five different nail art designs without the use of any nail tools. When you start to apply start with a base coat because it will help protect your natural nails.
Table of Contents
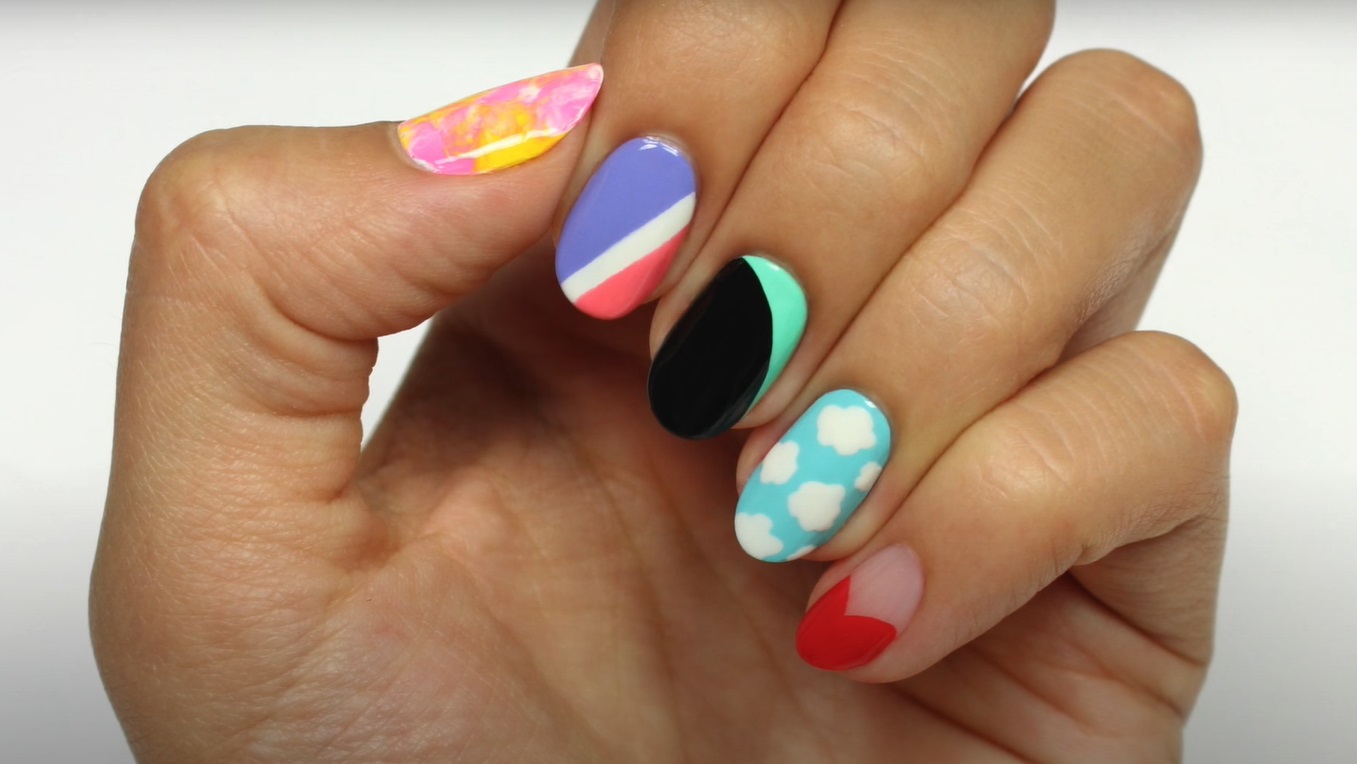
Nail Art 1: Marble Design
The first look is a really easy marble design look. First apply some liquid latex around your nail to protect the skin but if you don’t have this you can just put some scotch tape. For this you need pink, white and yellow polish. First apply the white polish for your base color. Now add blobs of each color onto the nail. Next use a plastic sandwich bag you have in your house, if not you can also use a plastic trash bag or grocery bag as well. Then press the plastic down on the wet polish and then it’ll marbleize it a bit and that’s it. Then remove the liquid latex or remove the scotch tape if that’s what you’re using.
Nail Art 2: Striped Design
Next one is a striped design, For this use pink, purple and white polish with purple being your base color. Then apply the white polish diagonally onto the nail and the same with the pink polish leaving a white stripe.
Nail Art 3: Curved Design
Next we have a curved design. For that you need bright mint and black polish with the mint being your base color. Then taking the black and curving it down the nail first and then filling in the rest.
Nail Art 4: Cloud Design
Next one is a cloud design. You will need blue and white polish with blue as your base color. All you have to to do is dab the tip of the white polish to form each cloud and this is super easy.
Nail Art 5: Heart Design
Last but not least is a heart design. Take a red polish and curve the Polish at the tip of the nail starting with one side and then doing the same thing to the other side to form the heart.
Finish your design with a fast drying top coat to seal and add a beautiful shine.