Trendy Gel Nail Polish Designs Idea
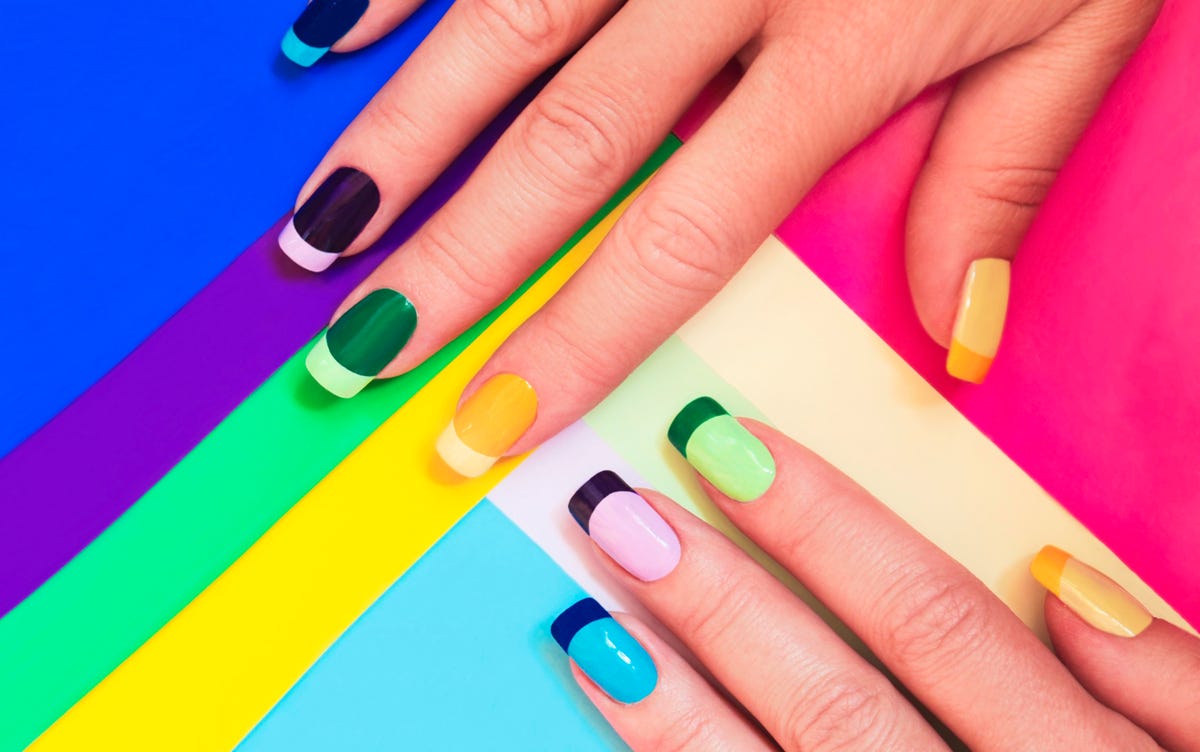
In this article we are going to try some amazing and beautiful gel designs. Here we are going to use gel nail polish because gel polish are long lasting and it will gives you a professional look like salon. You people going to love this because it is different and easy to do.
So, let’s start with the designs.
Things you need to do this design:
- Base coat
- Top coat
- Gel nail polish color that you like
- UV Light
- Silicone sponge
- Rubbing alcohol
- Cuticle oil
- Thin nail art brush
When you apply any nail polish or any nail art you should start with the base coat, because it will help you to protect your nail from any damage and harmful chemicals.
Table of Contents
Gel Nail Design 1: French Tip Nails

First we are going to show you people that how to do this earthy toned fall colored french tip nails. These are so easy.
Step 1: First take silicone sponge, paint the dark brown nail polish on it and dip your thumb nail in at an angle. You can do small french tips, medium french tips. Here we will do a bigger french tip, and then cure that for 30 seconds in your UV light.
Step 2: You can apply different colors, like on your pointer finger mix white and the dark brown that you used on your thumb.
Step 3: Do all of the french tip on all of your nails with whatever color you like and cure them for about 30 seconds.
Step 4: Next apply gel top coat to give it a shining and professional look. And do a final cure for 60 seconds with UV light.
Step 5: Now take rubbing alcohol put it on a little paper towel and rub that on all of your nails to get rid of sticky base from the gel top coat.
Step 6: At the end to moisturize your cuticles apply cuticle oil.
So, this design is easy to do and also go for all the occasion.
Gel Nail Design 2: Swirly Line Nails

This design is very trendy and beautiful. This design looks simple and easy to do so you can apply it whenever you want.
Step 1: First take a thin nail art brush and the dark brown color and make a swirly lines on your all nails, and cure them.
Step 2: Apply two coats to make sure it looks very opaque.
Step 3: Next do the exact same thing but with white nail polish.
Step 4: Again do the same exact thing with a tannish color, and with this color go over some of the other lines to give it a little bit of dimension look.
Step 5: Then apply a top coat to make your nails look super smooth.
Step 6: Then cure that for 60 seconds.
Step 7: At the end wipe them with rubbing alcohol to get the sticky coat off and use cuticle oil.
This is design is easy to and it looks classy.
Gel Nail Design 3: Green Matte French Tips

You are going to love this design because matte nail polish is very popular.
Step 1: First take the silicone sponge and apply the darker green on it. You can also do it without the sponge. If you don’t have the sponge but you have nail art brushes then take a thin brush and outline the french tip with a nail brush and then go with the actual nail polish and paint that on the tip of the nail and then cure that with UV light.
Step 2: Next apply the second coat just to make sure it’s very opaque, and cure it.
Step 3: Next take the lighter green and outline where the french tip is.
Step 4: Now take matte top coat and paint that on all your nails and cure that for 60 seconds.
Step 5: Now take a normal top coat and take a thin nail brush and apply this on the light green line that you did.
Step 6: Then cure them for 60 seconds with UV light.
Step 7: Now wipe it with rubbing alcohol, and then apply cuticle oil.
Gel Nail Design 4: Wavy Abstract/Swirls Design

This is going to be a bit difficult nails design and also take more time to do it.
Step 1: First apply base coat on your nails and cure those with UV light.
Step 2: Then take thin nail art brush and white nail polish first, and create a bunch of swirls along with your nails and make whatever design you want to do.
Step 3: And then go over again with everything you have done with a second coat, specially white nail polish is not opaque. and then cure that for 30 seconds.
Step 4: Now take black nail polish and and go over the other swirls to give the nails more dimension. You can outline them and then fill them in.
Step 5: You can apply black nail polish with a little bit more white just to make them look overlapped because it’s look much better.
Step 6: Next top it off with a top coat.
Step 7: You can do the same thing on other hand with red and white. It will give you a unique look.
You can also use white color with 5 different color and make it look more attractive. For this design you can also use candy colors or neon colors and it will look more cool and trendy.
Conclusion:
So, these are the design which you can do easily and because we are using gel nail paint then this is going to stay longer on your nails. If you don’t have enough time because of busy working schedule then these designs are perfect for you just because it is easy to do and long lasting.
You can also combine these 4 design with one or two colors and then apply a single color on your ring finger. With this designs you can try anything you want.