4 DIY Disney Halloween Costume Ideas
In this article, I am going to give you four DIY Halloween costume ideas and these costumes are inspired by Disney. These costumes are going to be a little bit more cute than scary, so it can be a little bit expensive and stressful.
Table of Contents
DIY Disney Halloween Costume Idea#1- Monster Inc
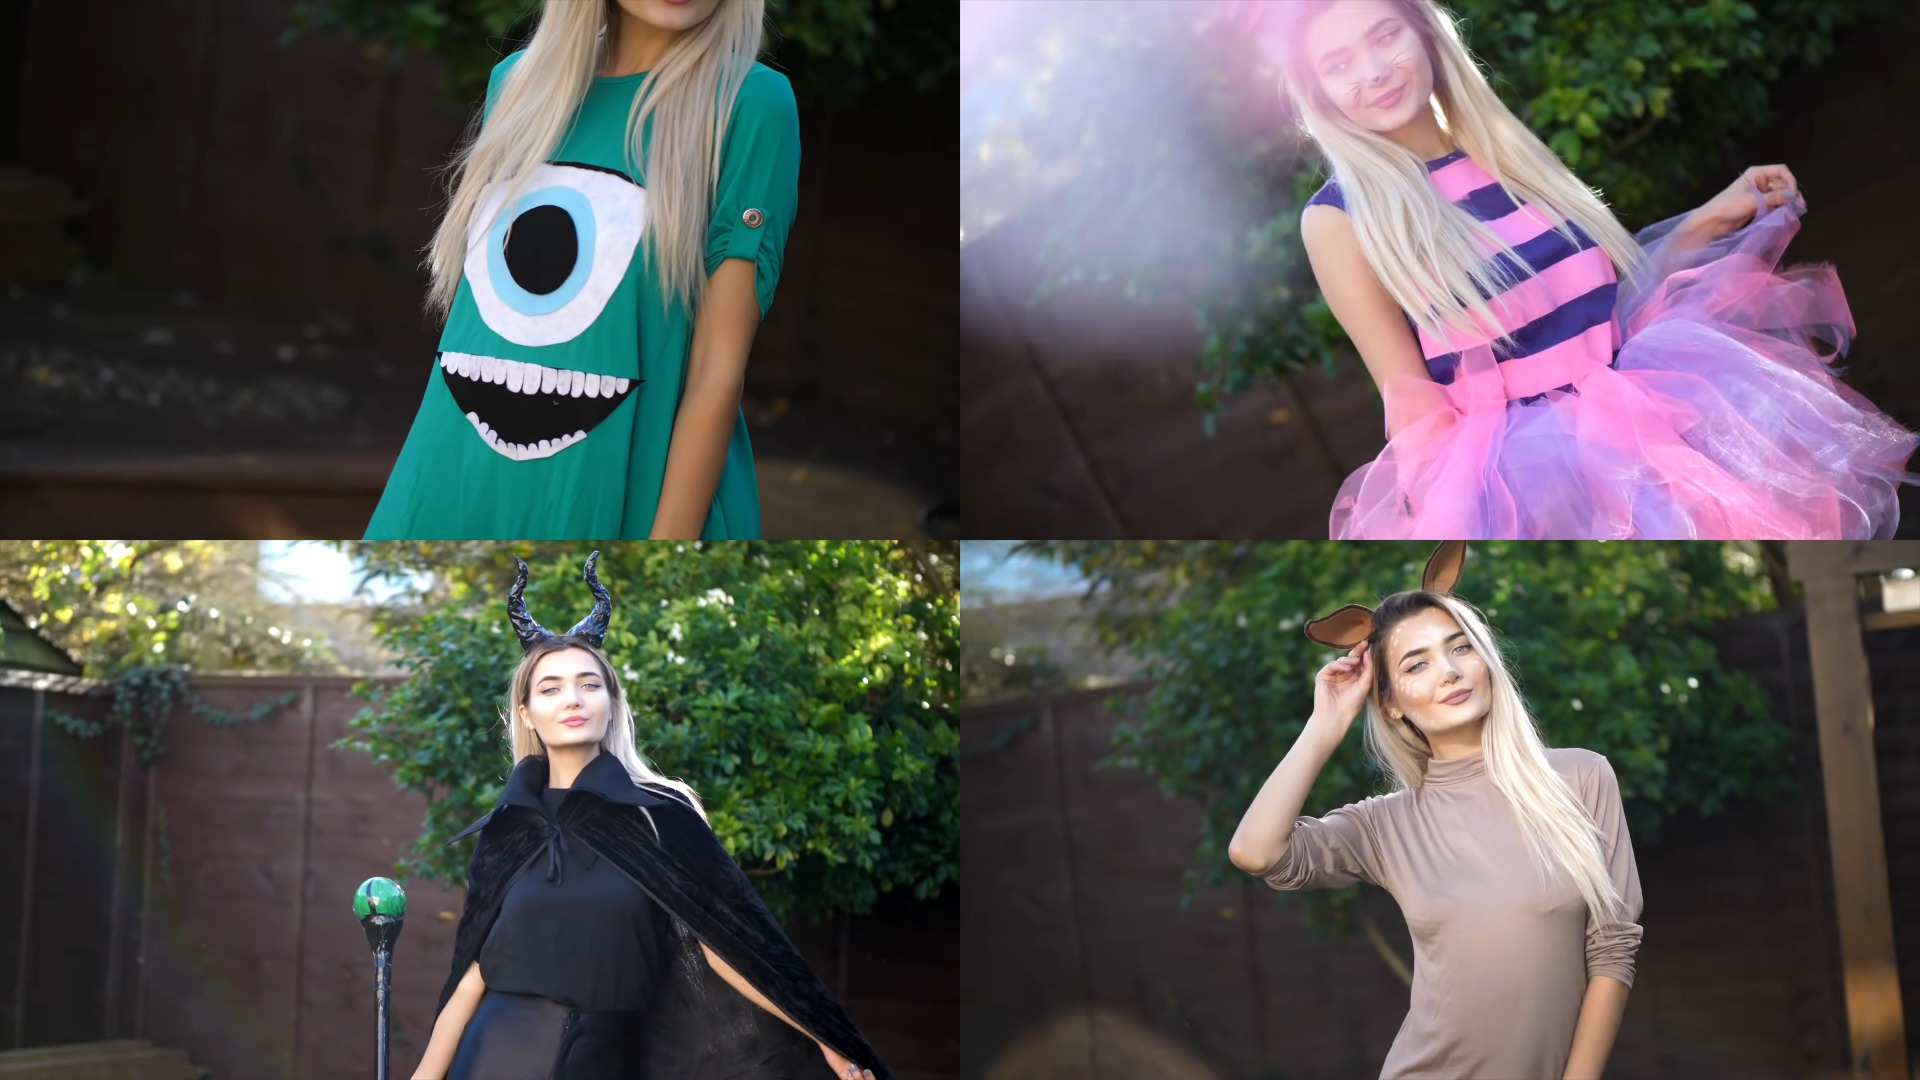
The first costume we’re going to be creating is the Monster Inc costume. For this all you’re gonna need is a Green top or dress, and some felt fabric in color black, blue, and also white.

Step-1
- The first thing you need to do is lay out to the green shirt and also, start cutting out a round eyeball kind of shape. Then you need to place that on top of the shirt and start gluing that onto the actual shirt with some hot glue.
- Then, you need to take the blue felt fabric and cut out a slightly smaller circle into the blue, and this is going to be creating the iris of the eyeball.
- Lastly, to finish off the eye, create the actual pupil. So, cut out a smaller round circle out of black felt and just glue that on to the rest of the eye.
- To finish off the eyeball, also you need to take a very thin piece of fabric and just glue that to the very top of the eyeball to create a lash line effect.
Step-2
- The next thing you need to do is take some black felt fabric, and just create the mouth shape.
- Now, for the teeth of the mouth, take some white felt fabric, and cut out little tabs that have rounded shapes at the ends.
- For the bottom, just do the same thing. So, cut out the teeth, and once you’ve got all of the shapes cut out and ready to be stuck on, take the hot glue gun and just apply a bit of glue under the tooth and just stick them onto the black fabric.

Step-3
- Now, we are going to create a little monster ink headband with some horns. So, for this take a brown headband, and some styrofoam cones.
- Now, just add a dot of hot glue onto the cone, and just stick that onto the headband that matches the hair color.
- This is the finished monster inc costume. You can pair this with some green stockings.
DIY Disney Halloween Costume Idea#2- Cheshire Cat
The next costume is a Cheshire cat costume, this is probably my favorite costumes of the four. So, basically what you need for this is a purple shirt.

Step-1
- The first thing you need to do is take a masking tape, and just gonna stick that on the shirt in stripes leaving the same distance between each part of the tape.
- What you need to do now is take some plain pink acrylic paint, and paint the space in between the tape.
- Once it gets dry, you’re gonna peel off the tape, and you’re gonna reveal this really cool stripes. Obviously, it’s not gonna be perfect but I think it will look pretty cool.
- Then just cut off the sleeves to make the shirt a little bit more tailored.
Step-2
- Now, take a purple headband and also, some purple cardboard which you need to cut out into the template of the cat is onto, and then it’ll take some purple felt fabric. So, use the actual cardboard ear as a template for the felt.
- You want the felt to be exactly the same size as the actual cardboard stencil, because we’re gonna be sticking on the felt onto the fabric.
- As the felt fabric is quite floppy, it’s not really gonna hold its shape, so we’re gonna really take advantage of the stiffness of the cardboard and that’s gonna give it that firm cat ear shape.
- Then you need to take some of the pink pipe wire and cut little strips of that and just kind of place that over the ears. Again, once you’ve got the desired length, start sticking them on to the actual felt fabric, so that they stay nice and secure.
- Then take both of those ears and cut out a little shape at the bottom, so that they fit a little bit nicer and snug over the actual headband. So, once you get the desired shape of those, use some hot glue and stick the ears onto the headband.
- Now, to really complete the ears, you can take some fluffy fabric and stick that onto the headband for some extra fluffiness.

Step-3
- Now, for the tutu of this outfit, you need to take really thick ribbons in purple and pink.
- To make the tutu, what you need to do is take a little bit of the ribbon and kind of measure out your waist and tie this in a round circle. So, this is going to be the base bar of your tutu, and you’re going to be adding all of the fluffy parts of the tutu onto that.
- Now, take some short strips of the ribbon and just tie it around in a knot and just let the ends kind of flow down, and create the tutu effect.
- You need to let the layers kind of build up, so that the ribbon becomes more and more opaque, so that it looks like a real tutu.
- You can alternate between the pink and the purple ribbons just to really continue that theme of the striped cat.
- After a little while once you really build up all the ribbon, it starts really taking shape and it looks super fluffy and really cute.
DIY Disney Halloween Costume Idea#3- Maleficent
The next costume is the Maleficent costume. I absolutely love this one ever since I watched the movie.

Step-1
- To make the headband, all you need to do is a brown headband and then take some tin foil like your regular kitchen tin foil and wrap it around at the headband creating the two horns.
- So, you need to just press and condensing that tin foil into the shape that you want it to be. You just need to kind of bending it inwards and then outwards.
- Once you have got your desired shape of the horns, you need to take some hot glue and just hot glue that in place to the headband.
- Then take the black masking tape from the first DIY, and take a few strips of that just to cover up the tin foil, and this is the finished headband.
Step-2
- Next up, we’re gonna make Maleficent famous star. So, for this we’re gonna be taking at a little Christmas globe and we’re gonna be pouring at some a darker green and lighter green acrylic paint into it, and just kind of mixing it around the inside to create the really cool swirly pattern.
- Then take an old broomstick and glue that globe on to the end of the broomstick.
- Then use the black tape and connect the two, so that you don’t see the gap between the broom and the actual globe.
- To really make it even more detailed and realistic, cut out little thin strips out of the tape, and just stick that over the actual globe, and also, stick the tape over the broomstick to make it all black and really match with the rest of the look and that is it for the staff.

Step-3
- The next part of the DIY is to create Maleficent famous collar. So, for this cut an A4 piece of a felt fabric in half like to create two triangles and then take some tinfoil and kind of fold it into a triangle as well, and sandwich that between the two fabrics.
- Putting the tinfoil inside is going to make it a little bit more malleable, and able to kind of like create some shape into it, rather than just having a floppy piece of felt fabric.
- So, you actually need to make two of these and then you can just hot glue those onto your long black robe.
DIY Disney Halloween Costume Idea#4- Bambi
The last costume is a Bambi costume. I absolutely love the Disney movie Bambi. So for this costume what you’re gonna need is a turtleneck and also some leggings both in brown color.

Step-1
- You’re going to need some white felt fabric that you’re just gonna cut a bunch of circles into. You can just kind of alternate between shapes, between sizes, just really make it your own because we’re gonna be creating the little spots that deer have on their back.
- So, once you have cut out all your circles, you just need to go ahead and glue those all on to the back of your top, and that is it for the actual top.
Step-2
- Moving on to the tail, use the felt fabric in a creamy kind of color and cut out the shape of the tail and then kind of do the same but a little bit smaller of the brown felt and just kind of glue that smaller shape onto the cream fabric.
- Then take the leggings and just glue the very top of the tail, kind of like fold it over and then stick that onto the back of the leggings.

Step-3
- For the actual reindeer ears, you need to take some Brown felt fabric and cut out the ear shape by folding over the fabric twice, so you get the same kind of stencil.
- Once you’ve cut the stencils out, you need to trim each of the sides to make the lighter brown fabric a little bit smaller than the darker Brown, so that when we hot glue the lighter Brown onto the darker brown, you can still see the edging of the dark brown fabric.
- Then take some hot glue and just pop a tiny dot at the very bottom of each of the ear, and just kind of fold it together a sense of free dimension and make the ears look a little less flat.
- Once that’s done, you need to take both of the ears and just stick them on to the brown headband and those are the finished reindeer ears.
Here are some more DIY Disney Halloween Costume Ideas: