8 Dutch Braid Hairstyles You Need to Try
In this article, I am going to explain you how to make 8 Dutch braid hairstyles that you need to try anyhow to master doing Dutch Braid. Continue reading the article to know how make these hairstyles.
Table of Contents
Things you need for these hairstyles:
- Comb
- Clear elastic bands
- Bobby pins
- Clip
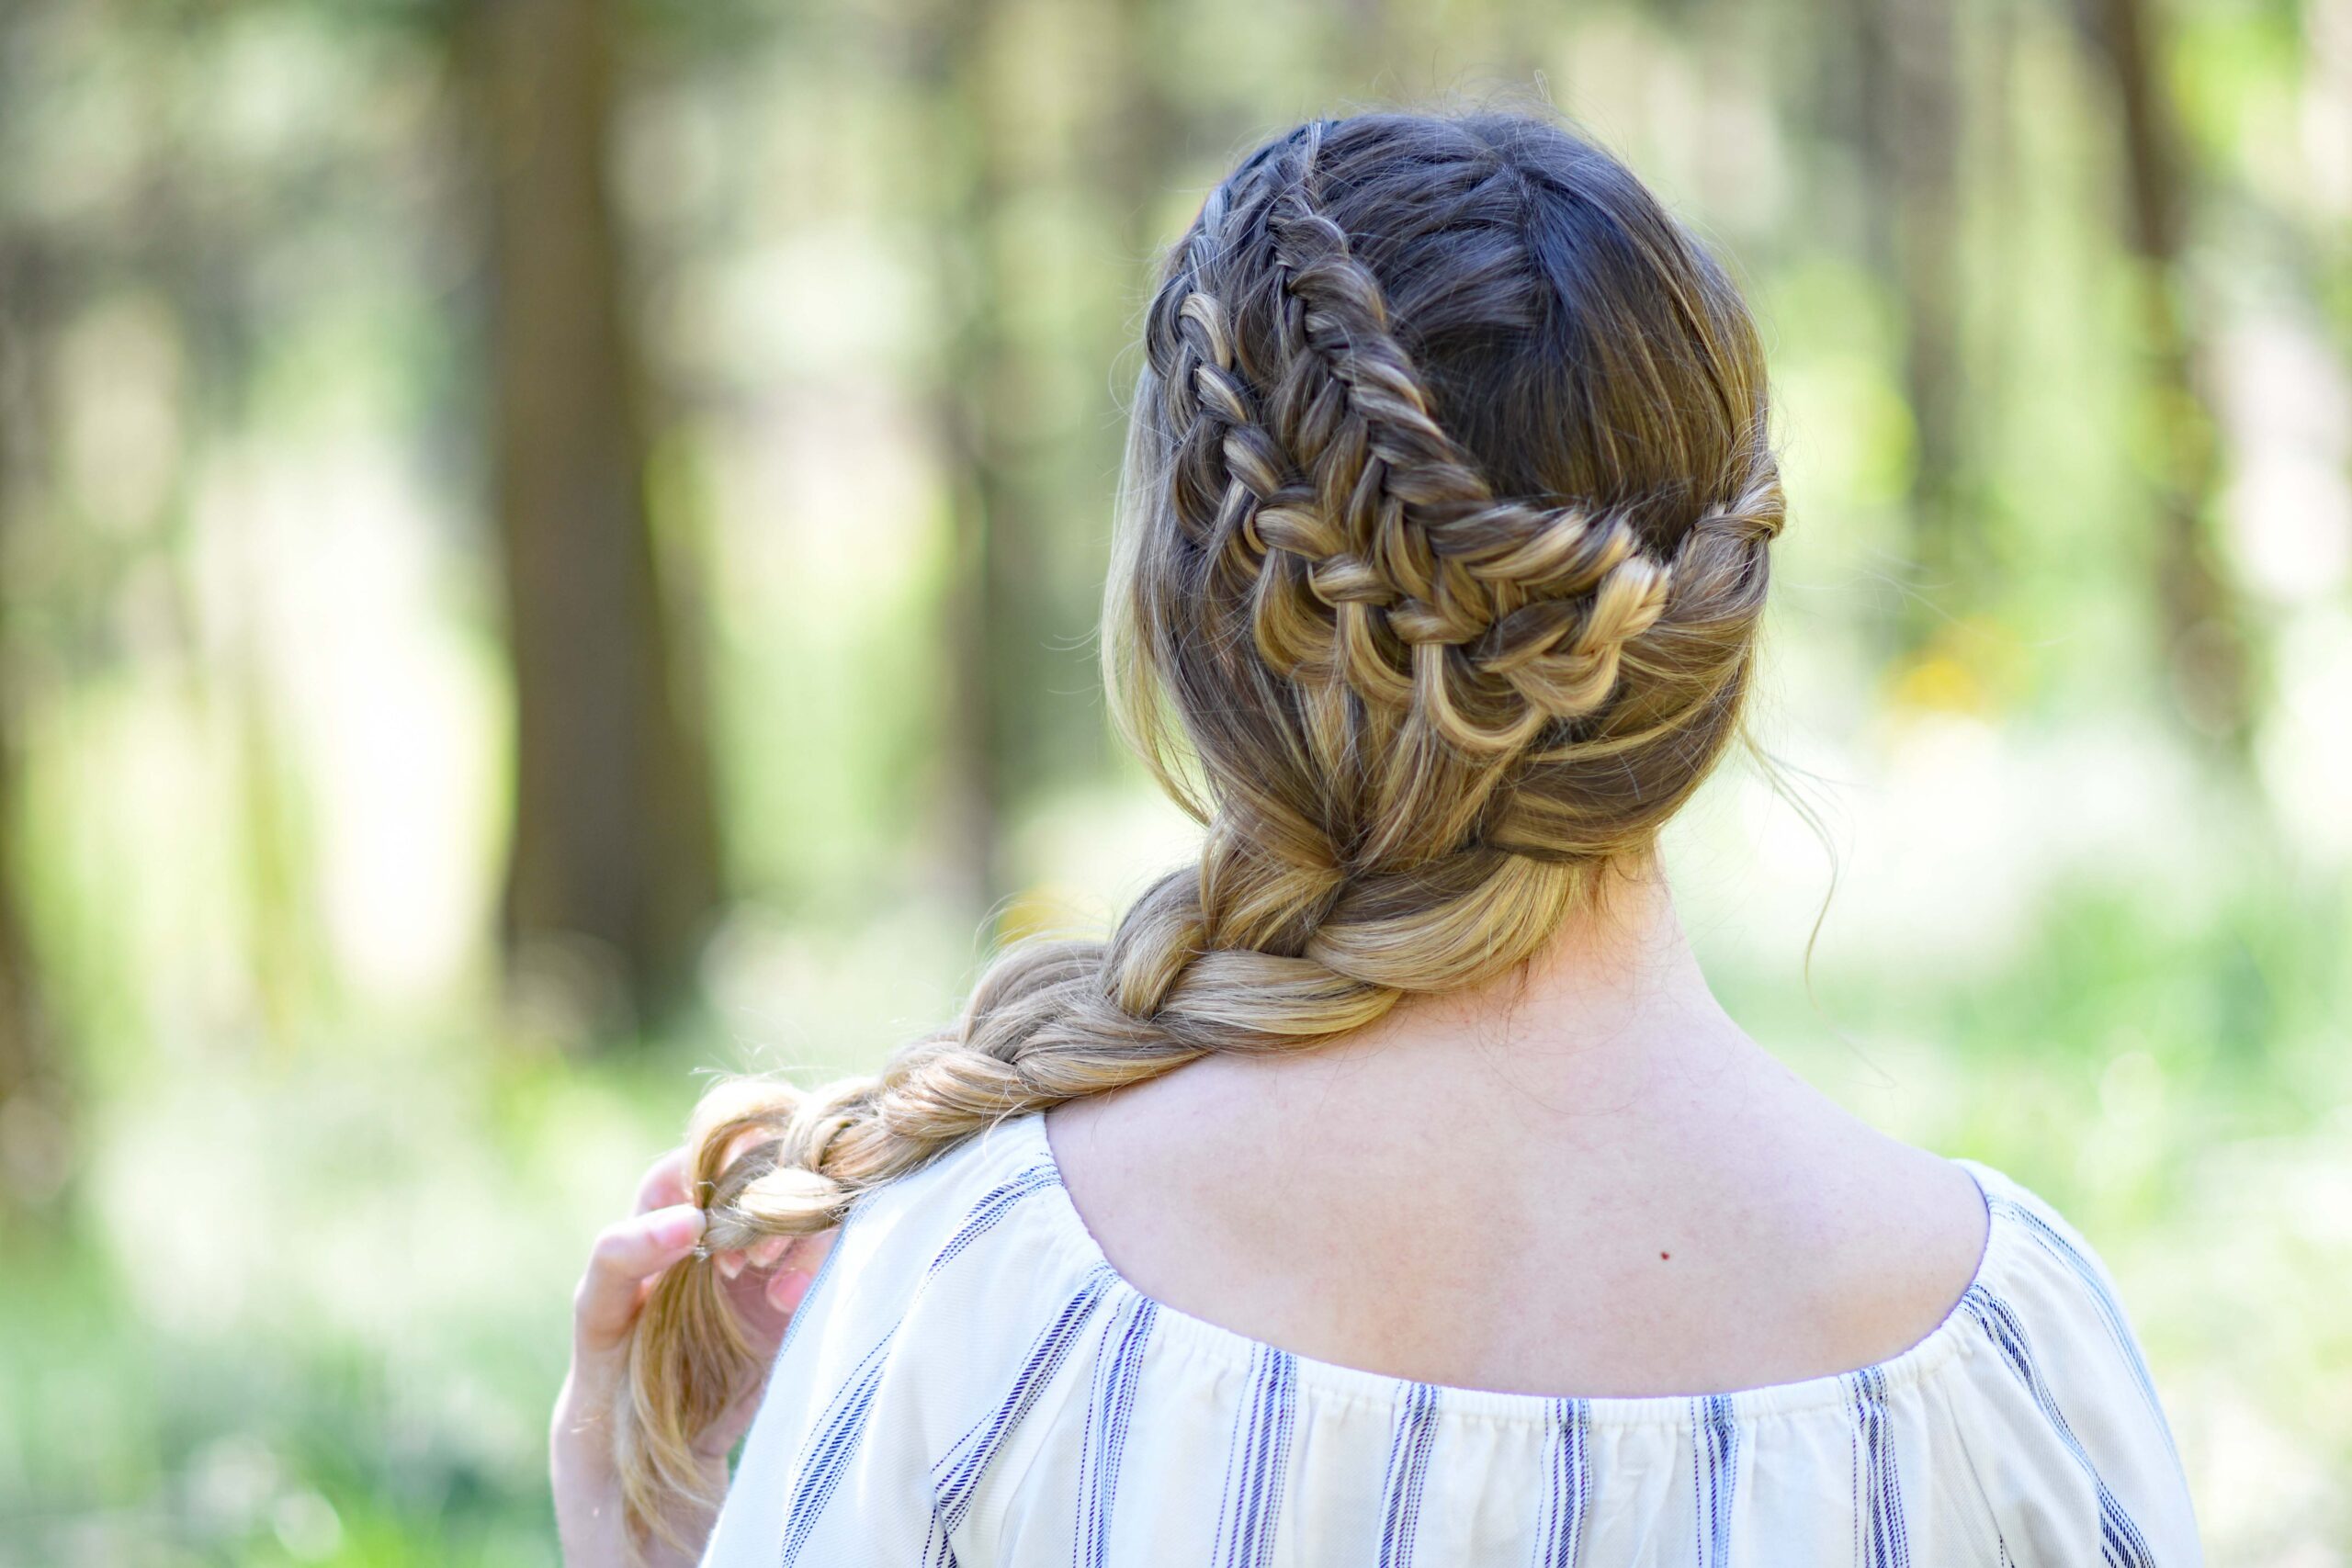
Dutch Braid Hairstyle#1
This is gonna be the only hairstyle that I’m going to thoroughly explain how to do a Dutch braid, so pay attention.

Step-1
The first step is to do side partition and then take a section of hair from the side that has more hair till your ear and take it all the way down. Then you need to clip the rest of the hair back out of your face so that it doesn’t bother you while you are doing your braid.
Step-2
Now, you need to start from the top of your head and you need to divide your hair into three equal strands, and make sure they are all equal in size.
Step-3
For the Dutch braid take the front strand and cross it underneath the middle strand. Then take the back strand and cross it underneath the middle strand. From this stage, you need to add in hair. So, take a small section of hair right into that front strand, cross them both underneath the middle section. Take the back strand, add in a small section of hair right next to it take them both cross them under the middle strand.
Step-4
Now, you just need to keep repeating the same process. So, take your front strand add in a small section of hair right beneath it into that strand take them both, and cross them underneath the middle strand. Take the back strand, add an edge section of hair right next to it, take those pieces combine them, and then place them underneath the middle strand, and we keep going. The first few stitches are a little tricky but once you get past the first few, then you’re good to go, then it gets bigger, and it gets easier, and you just keep repeating this all the way down.
Step-5
So, you need to do this Dutch braid all the way until you get to the top of your ear and then that’s when you need to stop it. Once, you’ve made Dutch braid your hair till your ear, then you’re just going to take the rest of the hair and do a normal three-strand braid.
Step-6
We’re just gonna do a couple stitches down, and then we’re going to take a bobby pin it back but before that you need to make your braid fluffier.
Step-7
Now, you can add some texture spray on your braid, not necessary but it just adds some grip and then you need to stretch out or pancake your braid. So, pinch and pull on the braid to make it fluffier. Make sure your other hand is holding down the braid while you are pulling out. This is important because you don’t want your braid to become very loose. So, you need to make sure you’re always holding it down one side at the end. So, pinch and pull and you should start to see it fluff up a little bit, you can totally make it huge or you can do it small.
Step-8
Now, take down your hair that you have clipped aside in the starting and then it’s gonna cover that part that you see in the back. That’s it, you are done with your first hairstyle and it just looks so cute.
Dutch Braid Hairstyle#2

Step-1
Again, for this hairstyle, we need to do the same Dutch braid. The same way, so just taking three strands of hair starting out with a regular stitch of braid just crossing the outside strands under the middle.
Step-2
Now, you need to add in hair to each outside strand, crossing it under the middle, add hair into each outside strand and crossing it underneath the middle strand.
What is different with this braid is you need to kind of doing each stitch angle it towards like the back of your head. So, you need to make sure you’re kind of angling the braid as you’re braiding. We are doing our braid like this because we need to put it into our messy bun.
An important thing to note with this braid is you don’t need to add too much hair to the back section because then all kind of bubble up and it will look funky.
Step-3
Stop adding in hair a little past eyebrow and then just do like a normal three-strand braid and then tie it off with a clear elastic.
Step-4
Now, you just need to gather your Dutch braids into a ponytail to make your messy bun, a normal little bun. Then take the rest of your hair and twist it around the bun.
Step-5
Now, you just need to play around with the bun, stretch it out, and bobby pin it into place. Also, you need to pancake the braid just a little bit, so, it just kind of fluff it out and that’s it, you are done with your second hairstyle.
Dutch Braid Hairstyle#3
Braid number three is going to be a side Dutch braid.

Step-1
For this hairstyle, you just start off the Dutch braid the same way dividing into three strands, adding in hair to the outside strands crossing them underneath the middle strands. With this braid, as you need to take your back section too, you should not start gathering from like the other side of your head until you are probably near your ear.
Step-2
Once you reach your ear, that’s when you need to start taking hair from the other side of your head and kind of incorporating it into your braid because like I mentioned earlier, you’re gonna start getting like bubbles in your hair and it will really look silly, and you’re not going to be able to bobby pin it. So, once you get past your ear, slowly start gathering hair from the back side.
Step-3
Now, you just need to keep adding in hair all the way down to create this beautiful side Dutch braid.
Step-4
Once you don’t have any hair left to Dutch braid then you just do a regular three strand braid and then tie it with a clear elastic. Last but not least, again you need to pancake it, fluff it, and stretch it. That’s it, you are done with your third hairstyle.
Dutch Braid Hairstyle#4
The fourth Dutch braid is a regular Dutch braid that we do towards the back of the head. But this hairstyle is going to take some practice because this is a different angle. So, make sure you master doing it in the front of your head because once you get to the back of your head, unless you have mirror in front of you and a mirror in the behind you’re not gonna be able to see what you’re doing.

Step-1
Again, for this hairstyle, you need to start doing your Dutch braid but from the top front of head going towards the back of your head. So, the same exact way but you can take larger sections here in this hairstyle which will make it a lot easier in my opinion to do a Dutch braid.
So, like the other ones, you’re just adding in hair to each outside strand and crossing it underneath the middle strand, super simple.
Step-2
Once you run out of hair to add in to the sides then you just want to do a regular three strand braid and tie it with a clear elastic.
Step-3
Then you need to fluff out your hair a little bit and pancake it to get more casual look. That’s it, you are done with your fourth hairstyle.
Dutch Braid Hairstyle#5

Step-1
For this hairstyle, you need to part your hair from the middle. Then you need to start doing Dutch braid on both sides of your head.
Step-2
Again, you need to start out with smaller sections and then you need to gather bigger sections as you are going further down your head. So, with these Dutch braids, you need to go towards the back of your head but not all the way back, just back enough so you can bobby pin it, and have hair covering the bobby pin.
Step-3
Once you find a good stopping point, just bobby pin it into place. You can use as much as bobby pins that you need to secure it in place. I really like this Dutch braids because they’re not too time-consuming like some Dutch braid hairstyles.
Step-4
Now, you need to braid the other side. You need to follow the same steps to do on the other side. Once you bobby pin it, that’s it you are done with your fifth hairstyle.
Dutch Braid Hairstyle#6
Braid number six is our upside-down Dutch braid. This one is very hard to do, this is an expert-level hairstyle. Save this one for last but do try it because it’s end result is just amazing. What is tricky about this braid is that when you’re adding in hair to your outside strands and crossing them underneath the middle strands, if your hair is pretty long then it can get tangled. So you have to smooth it out before you’re crossing the strands underneath the middle strand. If you have short hair, this is going to be your style. This is your hairstyle because they’re just so much easier to do on short hair.

Step-1
To start with, you need to start stitching your braid from the downside of your head to the top.
Step-2
Once you get towards the top, then you just need to tie it off with a clear elastic and then gather the rest of the hair up into a ponytail or else you can do your messy bun.
Step-3
Now, you need stretch out the braid little bit and also, your bun to make it look messy. That’s it, you are done with your hairstyle.
Dutch Braid Hairstyle#7

Step-1
For this hairstyle, you need to part your hair on each side a little bit, and you need to take the top of your middle section.
Step-2
Now, you need to start doing a Dutch braid all the way back from the top middle section. With this Dutch braid, you need to make sure you’re crossing under small sections of hair all the way back. Make sure they’re all even. That way this hairstyle, this braid doesn’t look all funky.
Step-3
Once you reach the crown area with the braid, you need to stop doing your braid, and tie the braid with a clear elastic.
Step-4
Now, you need to do the bun with the that braid hair. You can just make the usual bun just by wrapping it around itself and then just Bobby pinning it into place.
Step-5
Now, you need to pull out you braid a little bit to give it more look. That’s it, you are done with your seventh dutch braid.
Dutch Braid Hairstyle#8

Step-1
For this hairstyle, first of all, you need to part your hair from the side. Then you need to start doing a regular Dutch braid on the side that has more hair.
Step-2
For the Dutch braid like we always do add in hair to the outside strands, crossing them underneath the middle, and you need to do that all the way back till your ear.
Step-3
Once you get to your ear, you need to stop adding in hair then you just need to do a regular three strand braid all the way down.
Step-4
Now, you need to pancake you braid by holding the braid in one hand and then use a little clip and clip off the end of the braid.
Step-5
Now, you need to take the rest of your hair and do a normal messy bun. Then, remove that clip and wrap the braid around that bun, and then bobby pin it into place.
Step-6
Now, you need to pancake it, fluff it out the braid all the way around, and pull out hair on the front, and kind of mess it up a little bit, making it a little looser and then you are done with your last hairstyle Dutch braid into a messy bun up-do.
Here are some more dutch braid hairstyles: