How to Do Voluminous Half Up Half Down Hairstyle for Bridesmaid
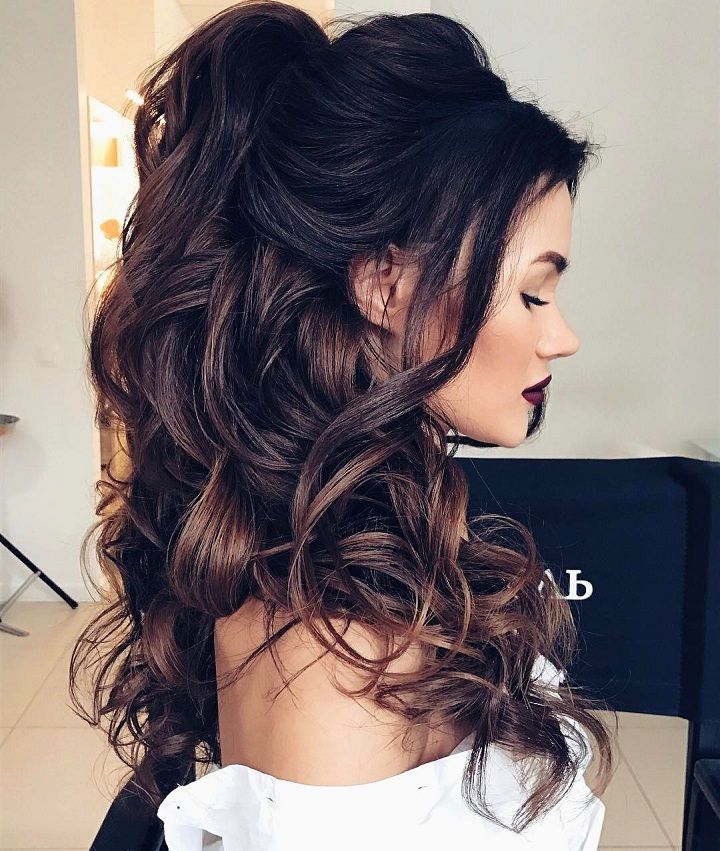
In this article I’m going to give you a brief description on how to do a beautiful half up half down style for a wedding or any kind of formal event. It’s going to be a beautiful voluminous half up half down.
Things you need for this hairstyle:
- Tea tree hair oil
- Comb
- 1 inch curler
- Heat protection
- Bobby pins
- Elastic bands

Here are the steps to do this hairstyle:
Step:1
In the first step, you need to use any tea tree oil to prep up your hair. I love to use such oil because it’s super lightweight and it just soaks right into the hair, absorbs right into the hair and into your skin. You need to use a really good tea tree oil which is super lightweight and just absorbs into the hair, it should not be super heavy but should nourish the hair and just prep it for our style. By this, you are going to get a nice smooth shiny end result, when we finish styling it.
Step:2
To start doing the hairstyle with take your brush and just comb it all the way through the hair to make sure all the product is evenly dispersed throughout the hair.
Step:3
Next, you are going to section the hair and start create some curls in it. It would be great if you use a wand for this style because it is a lot faster and saves a lot of time and also, the curly wand does a really good job of holding curls. Now, you need to use a heat protection that gives hold and helps to fight frizz and humidity which is great especially for anyone that’s going to have an outdoor wedding or anybody who has super frizzy hair. So you are going to spray each section that you going to curl, so they get that heat protection but also that hold.
Step:4
You can use a one inch curly wand to get big curls. You just need to start wrap you hair around and have it set at 360. Then remove the curler from you hair slowly and hold the curls on there for a second because doing this can hold the curls for longer time. You can also pin them up for even more longevity if it’s a certain type of hair texture that doesn’t like to hold the curl, you can definitely set it let it cool for 20 minutes.
Step:5
For the next section, you need to take zigzag sections and also, you need to bricklaying the curls that way you will not have curls in the lines that you’ve created and it fills in the hair and creates a nice beautiful flow. You need to alternate which way the curl space. So, if on the bottom, you turned the curls all left side then on the upper section, you need to turn them the other side and then you’re going to just keep alternating them and bricklaying them.
Step:6
After you are done your curling with the bottom and sides of your hair, when you are getting up towards the top, before you curl it you need to go ahead and get a little bit of product in the hair to prep it a little bit for the bump. So you need to use a little bit of the light texture powder to create the puff. For this you need to take a little section under there on the front and spray a little bit of that powder right at the root area. Now again you have to take another section back and it’s important that you just get this on the roots, you don’t really want to get much on the ends. Then you need to take your teasing brush and you need to lightly tease the hair section wise that you sprayed texture powder, so that you get voluminous puff. Then you need to lightly comb over it so that it doesn’t look messy at the top.
Step:7
Now, you need to take a little section right there on the top front and then twist it. At this point you can pull out some pieces if you want to give it some more texture or more volume just kind of where you want it. Then you need to tie the twisted section of hair with an elastic right there like a ponytail. The reason why you need to stop curling at this point is because if you were to curl the hair all over and then go back in and then give the volume, at this point it’s going to mess up your curl and you probably going to have to redo it anyways. So, its better you get your volume, your style like the base of it done first and then go back and curl the rest.
Step:8
The next step is take a section of hair from both the sides in the front and tie it with elastic bands. But for the volume that you want to achieve in your hair, you need to tie it below the second elastic. Then with the second ponytail, you can pull it a little bit tighter by twisting it inwards and then go ahead pinch and pull out the sides however you want to give them the amount of volume. Then you need to go ahead and brush those hair and smooth out because you need to curl it now.
Step:9
After finished curling your hair and there are some finishing touches that you need to do to get that voluminous look. For this you need to secure the second ponytail with the bobby pin underneath by just sticking it flat and weave it in. Then You just need to use your hands to comb out those curls and position it exactly where you want it.
Step:10
Last but not least, you need to take a little bit of hairspray to give your hairstyle a good hold.
Now, you are done with your voluminous half up half down hairstyle to be a Bridesmaid.
Here are some more Voluminous Half Up Half Down Hairstyles: