3 Easy No-sew DIY Halloween Costumes for Your Kids
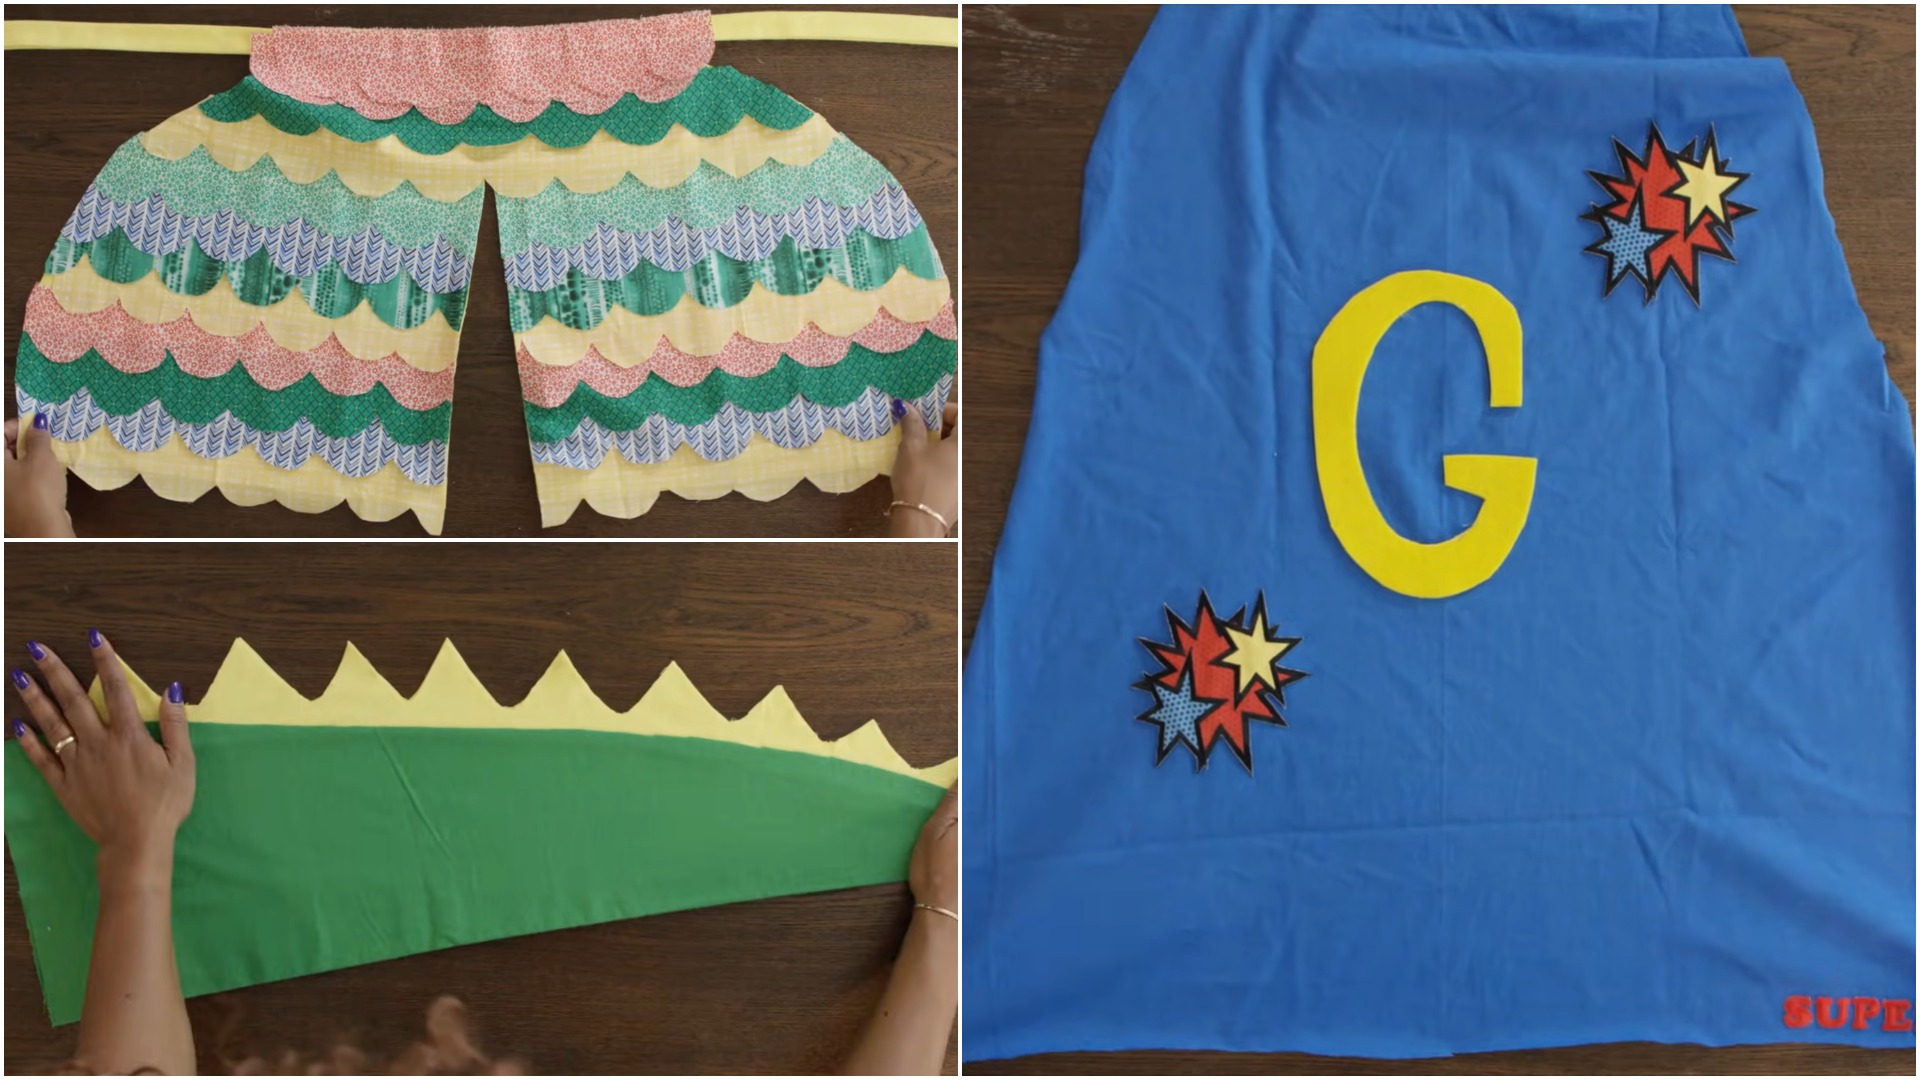
This article is all about explaining you three super simple no sew costumes for your kids but they’re going to be super easy. Continue reading the article below to know what are those three no-sew Halloween costumes for your kids and how to make those costumes.
Table of Contents
Easy No-sew DIY Halloween Costume for Your Kids#1- Superhero Cape

Our first project is the amazing superhero cape. This is going to be made out from an old t-shirt. It gets no simpler than this.
Step-1
The first step is going to be using a piece of felt. You’re going to simply draw out your child’s first initial on the felt and cut it out. Now that we have our initial cut out, it is time to make the Cape.
Step-2
Our next step is going to be cutting a triangle out of an old t-shirt. Make sure that you do not cut the neckline because that’s the part that’s going to secure it on your child’s back. So, you need to take the top layer, you’re going to cut a triangle up to the neck.
Step-3
Our next step is going to be removing all of the flap by trimming around the neck.

Step-4
The last step is to cut out your Cape. It’s going to be taking from an angle that lining it up with the cape to remove the arm of the t-shirt.
Step-5
Now, it’s time to add our finishing touches to this. Apply some fabric glue on to your letter on the cape and you can also iron on some graphics to beside the letter.
Step-6
Then go ahead and remove the bottom line of the cape because this will allow the Cape to flow a lot freer. Then you need to let this dry for about an hour to, and then the cape for your kid will be ready to take flight.
Easy No-sew DIY Halloween Costume for Your Kids#2- Bird Wings

Our second costume is going to be the bird wings. I am going to explain you how to do this as easy as possible and as quickly as possible.
Step-1
Our first step is going to be making our base. I used a piece of yellow cloth, you can use any colors that you want. Now, you need to cut out a half circle on the fold. You don’t need to over stress this being perfect.
Step-2
Our next step is going to be gluing these two flaps together, you can use fabric glue to secure the two pieces together. After you got that all secured and glued down, you need to set that aside and let it dry.
Step-3
Don’t throw away your scraps just yet, we’re going to use this to make our ties. You need to cut two long straight pieces out of the scrap. With the first one, we’ll use to do for the necktie. So, for that, fold the sides of the cloth inwards and fabric glue it and then we’re going to make one more fold to keep those unfinished edges hidden. Then, we’re gonna set this aside and let it dry.
Step-4
Now, we’re going to do our arm ties. Again do the same process as the neckline for this arm piece and then we’ll set this aside and let it dry.
Step-5
Now, we’re ready to cut our scallop strips. It is a little time consuming but it’s so worth it at the end. I used quilt fabric for this purpose. Now, you need to fold the cloth twice and cut small pieces out of it from the fold. Then you need to take each pieces alone then cut joined half circles out of it for scallop.

Step-6
Now, we’re going to repeat the same process with our other colors.
Step-7
Now, let’s get the body of the wings constructed. Go ahead and attach our necktie using the fabric glue.
Step-8
Now, to get our scallop strips onto the body of our bird, when placing these you need to give yourself about an inch in between and it’s awesome, if you can break lay your scallop.
Step-9
After you glued everything on, then let’s get all of the excess cut off. We’re gonna follow our pattern we already cut, leaving those at the bottom alone.
Step-10
With all of the excess cut off, it’s starting to take shape. Find the middle, and we’re going to do a single cut right up the middle. We’re not going to cut directly through the middle. Of the last two of our scallop rows, we’re going to cut underneath it, so when it splits, it’s hidden.
Step-11
Now, we just need to add our arm ties. Remember this long strip we made, so we’re gonna cut it in half, and then we’re going to attach it, blew them down.
Easy No-sew DIY Halloween Costume for Your Kids#3- Dinosaurs

Is your little one obsessed with dinosaurs, then this project is for you.
Step-1
To get started, let’s prep the spikes. The first step is to keep our fabric folded, and we’re also going to be cutting this on the fold in joining triangles shape.
Step-2
Now, let’s get the body of the tail together. For this you need to fold the cloth and cut it out to an triangle shape like dinosaurs tail shape and also, cut out a circle out of the cloth, and then cut out our waste ties.
Step-3
After you are done with cutting all the pieces, take the waist tie and fold the edges inwards and then fold them again and glue it down like we did in our last costume.
Step-4
Our next step is going to be gluing down the edges of our spikes with each other.

Step-5
Our next step is going to be assembling our tail, making sure that the narrow size of the spikes go down to the narrow side of the tail.
Step-6
Now, let’s get our tails stuff with the fiberfill. With our tails secured, we’re going to do a small fold in, this is going to give added security when your child is running around with this tail line.
Step-7
Now, that we have our waist ties on, and we have it completely stuffed, we’re going to add in our closure and we are ready to go.
These three easy no sew costumes will have your little ones dress-up closet the envy of the neighborhood.
Here are some more Easy No-sew DIY Halloween Costumes for Your Kids:


